
Winter Riding Guide
How to ride the Grand Valley in the winter
Part 1 of the Winter Riding Series
Western Colorado and the Grand Valley offer year-round riding opportunities on world renown trails. The riding doesn't have to stop when the temperatures drop and in fact, there are some exciting new dimensions of riding to enjoy in the winter. Being prepared is key to a good ride in the winter. This post shares a variety of tips to help ensure you have a fun, safe ride that protects our trails.
Dry trails and bright skies at the Lunch Loops
The Colorado Plateau Mountain Biking Trail Association, referred to as COPMOBA, has been building singletrack mountain biking trails in the Grand Valley and across the region for the last 30 years. A 501(c)3 nonprofit organization, COPMOBA relies on the support of its members, its volunteers, and successful grant applications to build and maintain thousands of miles of trail. If you enjoy the trails in the Grand Valley, please consider joining as a member and come out for a volunteer trail work day.
The Ride
Winter rides can be brisk mountain bike rides on the same dirt and rock enjoyed on warmer days in the Valley, fat bike rides on trails through snowpacked forests on the Grand Mesa or Uncompahgre Plateau, or mountain bike rides on partly to completely snowpacked trails in the Grand Valley. Picking what you want to ride, what bike to bring, and when to go will depend on your preferences, the day to day conditions, and what the temperatures will be like during the day.
Some winters, the Grand Valley doesn't see much of any significant snow accumulation so most rides down low, look very much like summer rides, just chillier. We can ride the same bikes we ride in the summer, same tires, and just some more clothing. Often after a few days of people riding trails, there will be a mix of sand and dirt in the remaining snow and ice providing more traction on the tread of the trail.
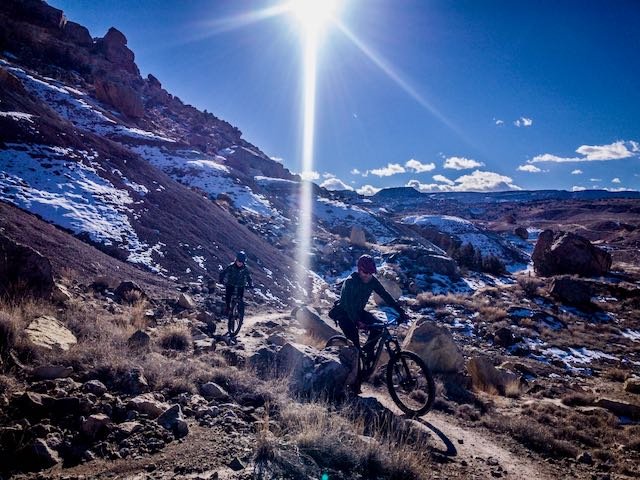
Some winters, we see some significant snow in the Valley and we have to adapt what and where we are riding to meet the conditions. Overall, we can ride the same trails in much the same manner, although traction is different on snow and ice than it is on dirt and rock. Understanding that it only takes a small patch of ice or snow to significantly impact your ride, hitting the trail with a little more caution can help avoid surprise crashes.
Up at 10,000 feet, winters are full on, and require specialized tires, bikes, and preparation. Winter riding on fat bikes on the Grand Mesa and Uncompahgre Plateau through a winter landscape with ribbons of packed snow winding through deep powder, is a magical ride for the prepared. Often riding on a narrow trail of packed snow will require more balance and steering control than on dirt or even snow packed dirt trail. Bike and tire setup significantly impact how easy it is to "ride the white tightrope" with flops down into deep powder the consequence for coming off the trail.
Picking what to ride and how to dress is part of the fun. In Part 1 of the Winter Riding Series, we explore some of the key choices you will make to have a good winter ride.
Trail Options
With so many trails, there are an amazing array of options to ride in the winter. During the winter months, many of the best trails and trail systems remain open and rideable, but different in January than they are in June. Depending on snow amounts and weather system patterns, the western trail systems like Kokopelli and 18 Road tend to see and hold more snow. The trails in the lower Lunch Loops have had years with significant snowpack, but tend to be a little lighter than the western end of the Valley. The snow amounts tend to increase again in Palisade, and can be 20 feet deep on top of the Grand Mesa.
Any time you ride in the Grand Valley, it is important to remember that if you are riding muddy trail, you need to abort your ride and turn around. The damage caused by riding muddy trail can be very significant and can destroy the expensive drive train of your bike and cause very significant damage to the trail requiring difficult maintenance from COPMOBA (preventing the organization from working on other trail projects).

The Gear
It is important to use the right gear in the winter. Bike selection, tire choice, clothing, nutrition, even the water bottle choice can have a big impact on the quality, sometimes even the safety, of a winter ride.
The Bike
Which bike you choose needs to match where you are planning to ride. If you are looking to enjoy some low elevation trail, you can often ride your summer bike. Cold temperatures impact suspension systems, so a hard-tail is often less maintenance and a good choice for winter. Riding a singlespeed can be challenging if there are slippery climbs, but possible if you run a bigger cog. Geared bikes can allow a more subtle power transfer which helps when things get slick. Modern hydraulic brakes can run without issue in colder temps, but if you have taken a bit of time off the bike or it has been a while since the last maintenance, a brake bleed may be in order. And the cold temps and changes in pressure can impact suspension systems. Warm air in your garage is less dense than cold air outside so suspension setups can change even if you check them at home before a ride.

Winter bike options
When things get deeper, a fat bike becomes the best and most effective bike. These 'big-boned" bikes allow for big tires and are often optimized for freezing cold conditions. Where complex suspension systems and geometries are common on today's trail bikes, fat bikes are often tuned for efficient energy transfer, cargo capacity, and dependability when conditions get challenging.
Tires
If there is snow and ice on the trail, but it is packed firm, then almost any mountain bike will do, but tire selection will matter. Slippery conditions favor more aggressive tires, more traction, and lower pressures. Plus tires are a great choice and add a little more traction for slick corners. Tire pressure can really make a big impact on traction and if you are riding snowpacked conditions, let some more air out than you would ride with on dry trails and feel the improvement! Tubeless tire pressures below 20 psi for 29er tires (plus tires below 15 psi) will roll smoothly and grab effectively.
When venturing out into deeper conditions, fat tires become important for traction, but also for floatation. A 4" fat tire with 3-5 pounds of pressure have a contact patch the size of a dinner plate and floatation that enables riders to pedal on snowpack that a hiker would post-hole in. When pedaling on groomed or packed trails, make sure you aren't leaving a rut by adjusting tire pressure accordingly. If you leave a track more than just a tread print, let out air. And remember that tire pressure, altitude, and temperature are linked. If you checked tire pressure in your garage and then ride in 0 degree weather at 10,000 feet, you need to check tire pressure again. Bring a pump and a low pressure gauge to get the optimum ride and do the best job at protecting the trail. A longer ride under changing conditions will often require changes in tire pressure. Although not always true, the adage, “if in doubt, let air out” is a good thing to consider when conditions get difficult.
Accessories
Riding in the winter means shorter days, cold conditions, and fewer people. Winter riders need to be prepared and self-sufficient. If something happens to your equipment or yourself, you need to be prepared to deal with it and that might mean spending some or all of the night outside.
Consider a water bottle with a "thermal" feature, carrying your water bottle in a coozie or other neoprene cover, and if you use a water bottle, try carrying it upside down since water freezes from the top, you will still have something to drink if your bottle is inverted. Carrying water in a hydration pack can be a good solution. The water in the bladder will be more resistant to freezing if it is close to your body. The drinking tube, out in the open, is susceptible to freezing. After taking a drink of water, blow air back into the tube to help reduce the chance of this happening.
In addition to your normal riding gear, you should consider bringing a full set of tools, a tube and pump, a light, and a communications device. Swap out the summer fanny pack for a larger capacity hydration pack or even a full backpack. You can more effectively carry the added accessories, additional clothing, and also the increased coverage a pack provides offers more heat retention.
Clothing
Riding in the winter is all about managing your temperature and the moisture your body generates with exercise. When dressing for a winter ride, wear clothing in layers that allow for wind protection and good moisture wicking.
The first layer against your skin is very important. It should be good at moving moisture off of you, and be able to retain some warmth when wet. Wearing a good base layer often will be all you need once you get pedaling up a climb on a sunny day. Your outer layer should be focused on wind protection and breathability is a nice feature, but not essential (since you can always take it off). A full zipper in the front helps vent excess heat and a hood can save the day when the temperatures plummet. Bringing an insulating layer to put on if you stop is an important safety resource, but it may remain in your pack for the whole ride. A vest of fleece or quilted synthetic insulation is a great, low volume choice if you want to go fast and light, but a warm jacket will be welcome if you have to stop for any length of time.

Dry trails under a winter sunset
A hat under your helmet should be considered an essential. Sometimes a thin, synthetic hat is all you need, sometimes windproof is important, and on the coldest days, windproof and balaclava-style will keep your head and neck warm and much more comfortable. A warm head makes for a warm body so managing your head covering should often be the first thing you do to warm up or prevent overheating.
Keeping fingers happy is an art and once you have it figured out, winter riding becomes much more enjoyable. A good, windproof, warm, slightly loose pair of gloves should be considered an essential riding tool. And if you are going to bring an "extra" something, a pair of very warm winter mittens or gloves should be top of your list. If you have a tendency toward cold hands, consider riding with pogies. These handlebar coverings can make the difference between ice blocks for fingers, or fun-filled rides.
Toes can get cold and painful if you ride in your summer shoes. Winter is a great time to switch to flat pedals and ride in winter hiking boots or dedicated winter riding boots. Although some people still ride SPD pedals and clip in, often snow get packed into the cleats making clipping in difficult or impossible, not to mention that the metal cleat can be a thermal conduit pulling heat out of your feet. Look for footwear with traction with a little more support. A taller boot than your riding shoe is welcome when stepping down onto slippery conditions. And if you are looking to purchase a new, dedicated boot, consider sizing the boot a half to a full size larger than you would normally. This will allow you to wear a warm sock and still have plenty of room to wiggle toes and allow blood to flow. If the conditions are more than ankle deep, the addition of a gaiter can really improve comfort and warmth.
Walking out the front door or hopping out of a warm car can often be a shock when you start your ride, but resist the temptation to bundle up like an arctic explorer. An old rule for winter athletic adventures is to, "leave the car cold". If you are pedaling up hill, you will likely be warm very quickly, and if you are already wearing all your clothing layers, they are going to get damp quickly which will lead to you getting cold. One of the biggest challenges of winter riding is managing layers. It is easy to just keep pedaling up a climb and soak your clothing. But doing so will likely set you up for getting cold later. Take the few seconds and shed a layer before you get hot and sweaty. And on the downhills, don’t ignore the chill. Stop and put a layer back on before you get cold. It takes a shift in behavior to get used to stopping to change your layers, but the discipline of managing your clothing is an important part of winter rides.
Nutrition
Riding in the winter can use a bunch of energy and preparing for that will help your rides be safer, more fun, and comfortable. Fuel up before you ride to ensure you have a good store of food to burn for both your exercise and also for thermal regulation. And bring some snacks that you can use to stoke the fire if you get chilly.
What you bring and where you store it is an important consideration. It only takes one failed attempt to get frozen goo out of packet. If you are bringing trail snacks that won’t be great if you kept them in a freezer, put them in a pocket or a place your body heat will keep them at a warmer temperature. Bars tend to be a little less susceptible to cold temps, but be careful on the first bite and if your snack is as hard as a rock, stick it in your armpit or against your skin for a few minutes.
Enjoy Winter Rides
If winter keeps popping in and out of the Valley and the sun turns last week’s snow into this week’s mud, remember, don’t wreck the trails and your bike. There are plenty of great options to find places to ride without doing damage. Find a trail or a trail system that is either dry or totally snow packed by exploring different parts of the Valley or changing your altitude. And for those rare storms that bring a mix of rain and snow that keep things muddy for days, head up on the Grand Mesa to play in the deep stuff, or enjoy a spin on the Colorado Riverfront Trail. Winter riding in the Grand Valley, with all its options, is hard to beat.
Look for the next parts of the Winter Ride Series for information about riding the primary trail systems of the Grand Valley.
Disclaimer: Mountain biking can be a hazardous activity and should be undertaken with appropriate understanding of the risks, regardless of the time of year. Please take responsibility for your choices and understand that COPMOBA and this article bear no responsibility for the consequences of your actions.

Snow and mud in the Lunch Loops
written by Dave Grossman | photos by Confluence Images | Dave Grossman